×
- Live Chat
- 1-888-511-3595

My Garage
My Account
Cart
Genuine Chrysler Cirrus Camshaft
Cam- Select Vehicle by Model
- Select Vehicle by VIN
Select Vehicle by Model
orMake
Model
Year
Select Vehicle by VIN
For the most accurate results, select vehicle by your VIN (Vehicle Identification Number).
5 Camshafts found
Chrysler Cirrus Camshaft
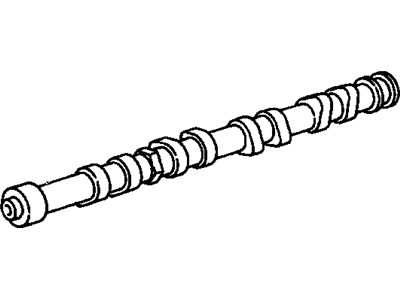
Camshaft is used in Chrysler Cirrus vehicle to control the operations of the intake and exhaust valves to allow the entry of air fuel mixture and expelling of the exhaust gases. The basic requirement for the engines is generally made of iron or steel and the camshaft in Chrysler Cirrus car mobil has three types, the camshaft works through the Over Head Valve (OHV), Single Over Head Cam (SOHC) and the Double Over Head Cam (DOHC). Each affects the performance of the engine differently, DOHC arrangements which enable independent control of the intake and exhaust valves, improving the flow and power. Camshafts of Chrysler Cirrus also utilize timing belts or chains to be connected with crankshafts to control timing of movements with pistons. Modifications including camshafts available from companies can increase power and efficiency of the vehicle depending with the desired driving characteristics such as lift and duration. However, lobe separation angle and valve overlap in the camshaft influences torque and idle quality making camshaft a vital component to the performance of Chrysler Cirrus vehicles.
Looking for affordable and high-quality auto parts? Then you have already arrived at the proper online shop. We offer all Chrysler Cirrus Camshaft at great affordable prices. Moreover, all genuine Chrysler Cirrus Camshaft come with a manufacturer's warranty. In the long run, you would realize you have saved a lot of trouble and money with OEM parts from here.
Chrysler Cirrus Camshaft Parts Questions & Experts Answers
- Q: How can the camshaft be removed from the engine with the cylinder head installed in V6 engine on Chrysler Cirrus?A: The camshaft(s) cannot be removed with the cylinder head(s) installed on the engine. Begin by removing the rocker arm shaft assemblies. If the camshaft in the right cylinder head is being removed, take out the distributor first. Next, remove the cylinder head. For the right cylinder head, carefully withdraw the camshaft from the distributor opening, ensuring not to damage the camshaft lobes or bearing journals. If both camshafts are being removed, identify each one for proper reinstallation. For the left cylinder head, remove the thrust case from the rear and withdraw the camshaft, again being cautious not to damage the lobes or journals. Remove the Camshaft Seal(s) as needed. Using a suitable scraper, remove all traces of gasket material from all gasket surfaces, taking care not to scratch or gouge the surfaces, as any damage may lead to leaks after reassembly. Clean the camshaft(s) with a rag soaked in lacquer thinner or acetone and visually inspect for wear or damage to the lobe surfaces, bearing journals, and seal contact surfaces. Check the camshaft bearing surfaces in the cylinder head for scoring or damage, as replacement may be necessary if they are excessively worn. Replace any components that fail inspection. Measure the camshaft lobes for excessive wear using a micrometer, comparing the center of the lobe with the edges; if wear is indicated, check the corresponding rocker arm and replace both if necessary. Lubricate the camshaft(s) and cylinder head bearing journals with clean engine oil, then carefully insert the camshaft into the cylinder head and install the thrust case or distributor, tightening the bolts to the specified torque. Set up a dial indicator on the cylinder head with the indicator tip on the camshaft at the sprocket end, then pry the camshaft to the rear until it stops, zero the dial indicator, and pry the camshaft forward to measure endplay. Compare this measurement with the tolerance; if excessive, check for wear on the camshaft and cylinder head thrust bearing surfaces and replace components as necessary. Clean the camshaft and bearing journals thoroughly, then coat them with engine assembly lube or oil before carefully inserting the camshaft into the cylinder head. On the left side cylinder head, install the thrust case with a new O-ring and tighten the bolts to the specified torque. Install a new camshaft oil seal in the cylinder head, inspect the cylinder head bolts, and install the cylinder head(s), torquing the bolts as specified. If the distributor was removed, install it with a new O-ring and tighten the mounting nuts to the specified torque. Complete the installation by reversing the removal steps, then start the engine and check for leaks and proper operation.


