×
- Live Chat
- 1-888-511-3595

My Garage
My Account
Cart
Genuine Chrysler Cirrus Instrument Panel Light Bulb
- Select Vehicle by Model
- Select Vehicle by VIN
Select Vehicle by Model
orMake
Model
Year
Select Vehicle by VIN
For the most accurate results, select vehicle by your VIN (Vehicle Identification Number).
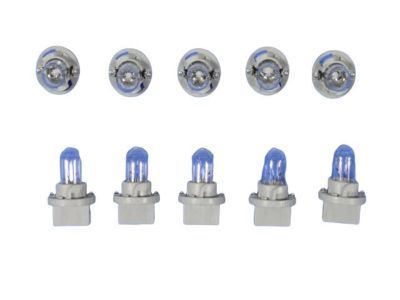
3 Instrument Panel Light Bulbs found
Chrysler Cirrus Instrument Panel Light Bulb
Looking for affordable and high-quality auto parts? Then you have already arrived at the proper online shop. We offer all Chrysler Cirrus Instrument Panel Light Bulb at great affordable prices. Moreover, all genuine Chrysler Cirrus Instrument Panel Light Bulb come with a manufacturer's warranty. In the long run, you would realize you have saved a lot of trouble and money with OEM parts from here.
Chrysler Cirrus Instrument Panel Light Bulb Parts Questions & Experts Answers
- Q: How do you replace fog light bulb, headlight bulb and instrument panel bulbs on Chrysler Cirrus?A: To replace the ash tray/cup holder bulb, insert a small screwdriver into the slot in the light bezel and pry it from the cubby bin, then puff the socket from the light bezel and remove the bulb from the socket, with installation being the reverse of removal. For the center mounted brake light, open the trunk lid, rotate the bulb holder 1/4-turn counterclockwise to withdraw it from the light bezel, grasp the bulb and pull it out, then using gloves or a clean shop towel, insert the new bulb into the holder, ensuring not to touch the bulb surface with fingers, and if touched, clean it with rubbing alcohol before inserting the holder back into the light bezel and rotating it clockwise to lock it in place before closing the trunk. To change the dome/amp bulb, use a small screwdriver to pry the dome light lens from the assembly, remove the bulb, and reinstall in reverse order. For the fog light, remove the screws securing the fog light assembly to the front bumper, withdraw it, grasp the bulb holder, rotate it 1/4-turn counterclockwise, remove it from the light bezel, pull the bulb out, insert a new bulb using gloves or a clean shop towel, and if touched, clean it with rubbing alcohol before reinserting the holder into the light bezel and locking it in place, then install the light bezel back into the bumper and secure it with screws while checking and adjusting the fog light beam. To replace the glove box light, open the glove box, pull down on the light/switch assembly to disengage it, puff the bulb from the socket, and reinstall in reverse order. For the headlight bulb, remove the headlight assembly, grasp the bulb holder retaining ring, rotate it 1/4-turn counterclockwise, remove the bulb holder, pull the bulb out, insert a new bulb using gloves or a clean shop towel, and if touched, clean it with rubbing alcohol before installing the bulb holder back into the headlight assembly and locking it in place, then attach the electrical connectors and reinstall the headlight assembly, adjusting if necessary. For instrument panel bulbs, depending on the location, access may be from under the dashboard; remove the instrument cluster, grasp the bulb holder, rotate it 1/4-turn counterclockwise, remove it, pull the bulb from the holder, install a new bulb, insert the holder back into the instrument panel, and lock it in place before reinstalling the instrument cluster. To change the license plate light, remove the retaining screws of the light assembly, withdraw it from the rear bumper, grasp the bulb holder, rotate it 1/4-turn counterclockwise, remove it, install a new bulb, insert the holder back into the light bezel, lock it in place, and secure the light bezel into the bumper with screws. For the park/turn signal bulb, remove the headlight assembly, grasp the bulb holder, rotate it 1/4-turn counterclockwise, remove the holder, push the bulb down slightly, rotate it 1/4-turn counterclockwise to withdraw it, install a new bulb, reinstall the bulb holder in the headlight assembly, attach the electrical connectors, and reinstall the headlight assembly, adjusting if necessary. To replace tail, stop, back-up, and turn signal bulbs, open the trunk, separate the trunk lining from the rear tail lamp assembly, unscrew and remove the plastic wing-nuts securing the tail light assembly, withdraw it from the quarter panel, disconnect the wiring harness, rotate the bulb holder 1/4-turn counterclockwise to withdraw it from the light bezel, pull the bulb from the holder, and reinstall in reverse order. For the trunk light, open the trunk, carefully insert a trim stick between the rear self-reinforcement panel and cargo lamp lens to pry it downward and remove it, grasp the bulb and remove it from the socket, and reinstall in reverse order. For the under hood lamp, disconnect the wiring harness, rotate the bulb counterclockwise, remove it, and reinstall in reverse order. Finally, for the visor vanity lamp, lower the visor, carefully insert a trim stick between the visor and vanity lamp lens to pry it outward and remove it, grasp the bulb and remove it from the socket, and reinstall in reverse order.


