×
- Live Chat
- 1-888-511-3595
My Garage
My Account
Cart
Genuine Dodge Neon A/C Accumulator
Accumulator- Select Vehicle by Model
- Select Vehicle by VIN
Select Vehicle by Model
orDodge
Neon
Year
Select Vehicle by VIN
For the most accurate results, select vehicle by your VIN (Vehicle Identification Number).
4 A/C Accumulators found
Dodge Neon DRIER-Air Conditioning Filter
Part Number: 4883282$55.62 MSRP: $71.88You Save: $16.26 (23%)
Dodge Neon ACCUMULAT-Air Conditioning
Part Number: 5140325AA$63.73 MSRP: $116.00You Save: $52.27 (46%)


Dodge Neon A/C Accumulator
Even though A/C accumulator fitted in Dodge Neon vehicles is small in size, it is an important component of the automotive air conditioning system as it has additional functions of controlling the effectivity and durability of the A/C system. Its initial purpose is to remove dirt and other traces of water so as to protect the components of the A/C system. In this component, the structure consists of a circular one that is connected with the condenser and the expansion valve, by means of inlets and outlets for the refrigerant. Although the overview does not distinguish between various types or styles of A/C Accumulator applicable to different Neon models, the general structure remains rather similar. As a result of filtering contaminants and moisture, the A/C Receiver Drier plays its part in making the air conditioning system very effective to give comfort to the users of the car.
Looking for affordable and high-quality auto parts? Then you have already arrived at the proper online shop. We offer all Dodge Neon A/C Accumulator at great affordable prices. Moreover, all genuine Dodge Neon A/C Accumulator come with a manufacturer's warranty. In the long run, you would realize you have saved a lot of trouble and money with OEM parts from here.
Dodge Neon A/C Accumulator Parts Questions & Experts Answers
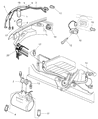
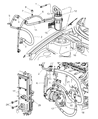
- Q: How to Replace the Receiver/Drier on Dodge Neon?A: Replacement A/C accumulators are highly effective at absorbing moisture. Ensure the system is discharged and disconnect refrigerant lines, replacing O-rings and plugging open fittings. Lift A/C accumulator from rubber grommet. For installation, follow the reverse steps. Add one ounce of refrigerant oil and replace O-rings.
- Q: How to Remove and Install an Accumulator on Dodge Neon?A: Replacement accumulator units are highly effective at absorbing moisture and can quickly become saturated when exposed to the atmosphere. To minimize system exposure, it is important to have all necessary tools and supplies ready for quick reassembly during installation. REMOVAL: The accumulator is located between the evaporator outlet and the compressor suction port. Prior to removal, ensure that the system is discharged. Next, remove the mounting bolts of the cruise control servo and position it aside without disconnecting any components. Proceed to remove the low pressure cycling switch from the accumulator. Disconnect the refrigerant lines from the accumulator, replacing the old O-rings with new ones and plugging the open fittings to prevent dirt and moisture entry. Finally, remove the bracket screw at the base of the accumulator and lift it from the engine compartment. INSTALLATION: The installation process is the reverse of removal. If a new accumulator is being installed, add one ounce of refrigerant oil to it before installation. Replace all O-rings with new parts. Once the installation is complete, take the vehicle to a shop that discharged it and have the system evacuated, recharged, and leak tested.


