My Garage
My Account
Cart
Genuine Jeep Wagoneer Brake Master Cylinder
- Select Vehicle by Model
- Select Vehicle by VIN
Select Vehicle by Model
orMake
Model
Year
Select Vehicle by VIN
For the most accurate results, select vehicle by your VIN (Vehicle Identification Number).
2 Brake Master Cylinders found
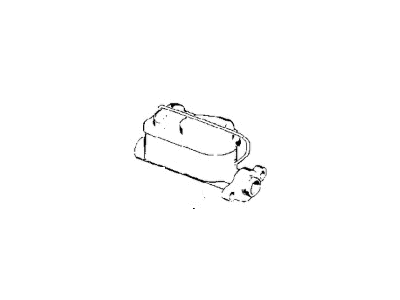
Jeep Wagoneer Brake Mastr Cylinder
Part Number: V1102622AA$97.40 MSRP: $155.00You Save: $57.60 (38%)
Jeep Wagoneer Brake Master Cylinder
Brake Master Cylinder found in Jeep Wagoneer cars is used to convert force exerted by the foot into hydraulic pressure used to move slave cylinders. This one works through pistons to pump fluid and enable the movement of either calipers or drum brakes to bring the wheels to a halt. Standard Wagoneer vehicles have interconnected power and manual brake master cylinders that have two pistons, then a secondary master cylinder for each circuit; this implies that even when the hydraulic pressure of one side is lost, the other side should be capable of providing enough pressure to halt the car. Failure to maintain the master cylinder can result into corrosion, internal malfunctions, and leaks, all of which will impact on the cylinders effectiveness resulting in a low pedal and poor stopping. Since it involves control of hydraulic force and pressure distribution, the Brake Master Cylinder is a very important unit of the braking system of the vehicle.
Looking for affordable and high-quality auto parts? Then you have already arrived at the proper online shop. We offer all Jeep Wagoneer Brake Master Cylinder at great affordable prices. Moreover, all genuine Jeep Wagoneer Brake Master Cylinder come with a manufacturer's warranty. In the long run, you would realize you have saved a lot of trouble and money with OEM parts from here.
Jeep Wagoneer Brake Master Cylinder Parts Questions & Experts Answers
- Q: How to consider when overhauling the master cylinder on Jeep Wagoneer?A:When considering the overhaul of the Brake Master Cylinder, it's important to first explore the availability and cost of new or factory rebuilt units and check for the availability of a rebuild kit. Proceeding with the removal, precautions should be taken to prevent brake fluid spillage and damage to paint by using rags under the brake line fittings and covering disconnected line ends. Utilize a flare-nut wrench to loosen the tube nuts at the brake lines' ends entering the Brake Master Cylinder, then plug the line ends to prevent contamination. Remove the Brake Master Cylinder mounting nuts and the reservoir cover before discarding any remaining fluid. For the overhaul process, secure the Brake Master Cylinder in a vise and remove the primary piston snap-ring by depressing the piston and extracting the ring with snap-ring pliers. Remove the primary piston assembly and discard it, as it can only be serviced as an assembly. Remove the secondary piston assembly by applying compressed air to the secondary brake line port, ensuring proper shielding. Inspect the cylinder bore for damage or corrosion, and if found, replace the Brake Master Cylinder body. Clean components, assemble new seals, O-ring, piston spring, and seal retainer to the secondary piston, and lubricate the cylinder bore and piston assemblies with clean brake fluid. Install both pistons, the snap-ring, and inspect the reservoir cover and diaphragm. Bench bleed the Brake Master Cylinder by filling it with brake fluid, inserting threaded plugs into the outlet holes, and repeatedly pushing and releasing the piston while maintaining the appropriate plugs. Once fully bled, refill the Brake Master Cylinder reservoir, install the diaphragm and cover assembly, and proceed with the installation, followed by brake bleeding.


