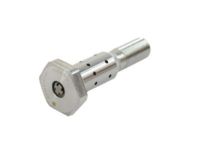
Make sure this part fits

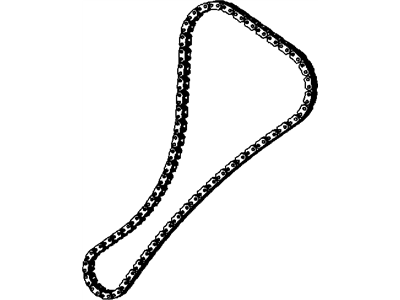
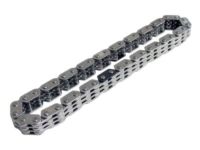
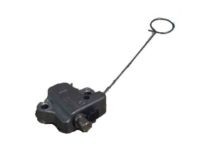
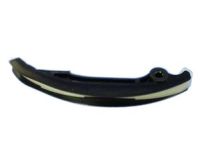
Chrysler 5184352AF Chain-Timing Secondary

2011-2023 Chrysler 5184352AF

Customer Questions & Expert Answers (16)
Mopar 5184352AF Chain-Timing Secondary
  • Part Description
    Chain Timing Secondary
  • Replaces
    5184352AE
  • Manufacturer
    Mopar
Make sure this part fits
$61.88 MSRP: $93.20
You Save: $31.32 (34%)
1
ADD TO CART
  • Related Parts
  • Product Specifications
  • Vehicle Fitment
  • Customer Questions & Expert Answers
  • Product Specifications

    BrandGenuine Chrysler
    Manufacturer Part Number5184352AF
    Part DescriptionChain Timing Secondary
    Other NamesTiming Chain
    Item Dimensions0.8 x 5.1 x 14.7 inches
    Item Weight1.50 Pounds
    ConditionNew
    Fitment TypeDirect Replacement
    Replaces5184352AE
    ManufacturerMopar
    SKU5184352AF
    WarrantyThis genuine Mopar part is guaranteed by Mopar's factory warranty.
    Shipping & ReturnShipping Policy Return Policy
    Warning: California’s Proposition 65
  • Vehicle Fitment

    Year Make Model Engine Important vehicle option details
    2011-2017 Chrysler 2006 Cyl 3.6LC AWD, C FWD, Limited, Limited Convertible, Limited Sedan, LX, LX Sedan, S AWD, S Convertible, S FWD, S Sedan, Touring Convertible, Touring Sedan
    2011-2023 Chrysler 3006 Cyl 3.6LBase AWD, Base RWD, C AWD, C John Varvatos AWD, C John Varvatos RWD, C Luxury Series AWD, C Luxury Series RWD, C Platinum AWD, C Platinum RWD, C RWD, Limited AWD, Limited RWD, S AWD, S Luxury Series RWD, S RWD, S V6 AWD, S V6 RWD, Touring AWD, Touring RWD
    2011-2016 Chrysler Town & Country6 Cyl 3.6LGold, Limited, Limited Platinum, LX, S, Touring, Touring L, Touring-L
  • Customer Questions & Expert Answers

    Q:
    Will this fit my truck? Posted by MoparPartsGiant Specialist
    A:
    You can Select Your Vehicle to check if 5184352AF fits your vehicle.
    Posted by MoparPartsGiant Specialist
    Q:
    How to remove and install Timing Chain and cover in four cylinder engine on Chrysler 200? Posted by Customer
    A:
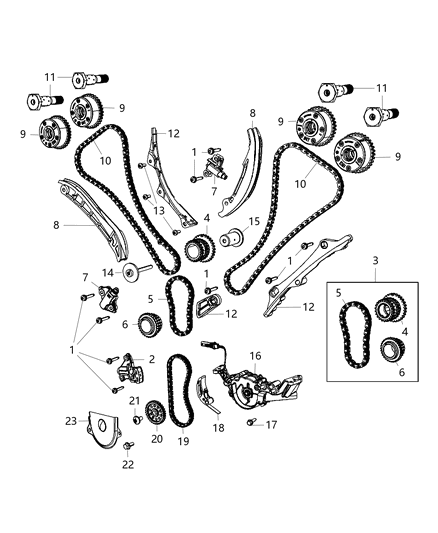
    Caution is advised as the timing system is complex, and mistakes can lead to severe engine damage; only highly experienced individuals should attempt this procedure, and consulting an expert is recommended if there is any uncertainty. Double-check all work to ensure correctness before starting the engine, and do not rotate the crankshaft or camshafts separately during this process to avoid valve damage. Several special tools are necessary, so ensure they are obtained beforehand. Begin by relieving fuel system pressure and disconnecting the negative battery cable, then loosen the lug nuts on the right front wheel, raise the vehicle, and support it securely. Drain the engine coolant and oil, remove the right-front wheel and drive-belt splash shield, and take off the engine cover. For 2015 and later models, also remove the intake tube and air filter housing, and position the coolant expansion tank aside. Remove the drivebelt, tensioner, and idler pulleys, then position the number one piston at Top Dead Center. For 2014 and earlier models, remove the power steering fluid reservoir without disconnecting the lines, and secure it out of the way. Remove the crankshaft pulley, ignition coils, and valve cover, taking care not to let the magnetic timing wheels come into contact with any magnets. Remove the water pump pulley and, for 2014 and earlier models, the air conditioning compressor and bracket. Remove specific oil pan bolts as instructed, support the engine, and remove the right-side engine mount and its bracket. Take out the timing cover mounting bolts, carefully pry the cover free, and clean off any RTV gasket material. If the engine has moved from TDC, temporarily install the crankshaft pulley bolt and align the timing marks. For 2014 and earlier models, align the timing chain plated links with the camshaft phaser timing marks, ensuring proper alignment of the phaser or sprocket marks with the plated links. Inspect the timing chain dampener for wear, clean the timing chain and sprockets, and replace them if necessary. Before starting the engine, rotate the crankshaft by hand to check for resistance. Remove old gasket material from all components, install the crankshaft sprocket and oil pump chain if removed, and ensure the keyway is at TDC. Coat the sprockets and chain with clean engine oil, align the chain with the camshaft sprockets, and install the camshaft sprocket. Hold the timing chain tensioner in place, install the chain guide and tensioner, and verify the alignment of all marks after rotating the engine. Apply RTV sealant to the timing cover sealing surfaces, install the cover, and tighten the bolts in a criss-cross pattern. Complete the installation by reversing the removal steps, adding oil and coolant, and starting the engine to check for leaks.
    Posted by MoparPartsGiant Specialist
    Q:
    What special tools are necessary to complete the timing chain replacement procedure in 2.7L V6 engine on Dodge Challenger? Posted by Customer
    A:
    Extra equipment is required to perform this process, and it is advised that one read through the whole process then gather these tools. Because timing chain entails a lot of effort to be used when being accessed and replaced, and more so because the water pump is located close to this part, then the water pump should be checked thoroughly and replaced if need be. The 2.7L engine employs three timing chains with one primary timing chain linking with the crankshaft sprocket, water pump, and two timing chains linking the two intake camshaft sprockets and two secondary timing chains link the intake and exhaust camshaft events appropriately. First remove the negative battery terminal, release fuel pressure and drain the cooling system. Take out the cooling fan assembly, coolant reservoir, radiator, accessory drive belts, crankshaft pulley, upper intake manifold, valve covers, spark plugs and place the engine so that number one piston is at the top of the compression process. Loosen the air conditioning compressor, get rid of the water outlet housing, idler pulley, and timing chain cover as well as check for slant of the bolts by drawing on paper. Turn the engine so that the timing mark on the flywheel is lined up with the mark on the crankshaft, take out the primary timing chain tensioner and the nuts and bolts from the primary camshaft sprocket. Gently remove the primary sprockets from the camshaft hubs taking the necessary note of the left and right camshaft sprockets' features. Take off the Primary timing chain guides and tensioner arm, and then the primary timing chain out. Wear check the camshaft, water pump and crankshaft sprockets, and replace them if they are worn out. If removed, fit the crankshaft sprocket aligning the oil pump housing mark and fit the upper chain guards. Proper positioning of the main timing chain involves setting the star mark on the sprocket with the light colored links on the NEW chain, before lowering it and the sprocket into place. Put in the correct camshaft sprocket and timing chain, so that links of the colored varieties connect to their marks. Position and secure the lower chain guide and tensioner arm, bleed the tensioner of oil, set it and bolt it back into position with a new lower tensioner O-ring gasket. Ensure that camshaft sprocket retaining bolts are tightened, ensure that the timing chain is pulled and the timing marks aligned before releasing the tensioner. Remove the old sealant from the timing chain cover, apply some RTV sealant on the cover and vice tighten the bolts in the right torque. The remainder of the installation procedure is the reverse of the removal procedure; refilling of the cooling system is also done. In case the crankshaft sprocket has to be removed, few tools and equipment that are necessary are a three jaw puller, propane torch or installation tool, and a machinist ruler or dial caliper. After the removal of the first timing chain, adopt the puller to get off the crankshaft sprocket. To install sprocket, it is recommended to use sprocket installing tool though one can heat the sprocket hub with the propane torch and must align it to the maximum extent that the distance between end of the crank shaft and face of the sprocket should equal 1.537 +.020 or -.020 inch.
    Posted by MoparPartsGiant Specialist
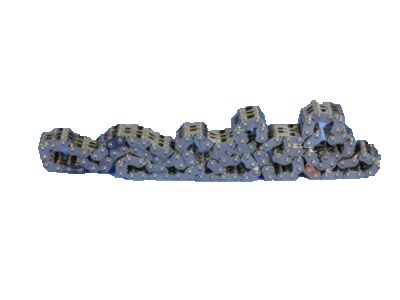
    Q:
    How do you inspect and replace a timing chain on Dodge Grand Caravan? Posted by Customer
    A:
    In order to examine the timing chain, the first step sanctioned is the removal of the timing chain cover. If an engine has many miles on it, or if there is visible damage to the chain, or if the amount of freeplay beyond the two small pins that secure the chain exceeds one inch, then a new timing chain should be installed because as the chain wears, the engine will not idle smoothly, lose power, and experience decreased fuel efficiency, and the chain can 'jump' timing or break which will damage the engine. Loosen the tension of the timing chain cover and bolt down the vibration damper so that crankshaft is turned such that the arrow on the crankshaft sprocket aligns with the top and of the camshaft sprocket arrow should be resting at the bottom. To do so, undo the camshaft sprocket bolt with some measures and then with your hands cautiously push the camshaft sprocket from the dowel pin with the help of two big screwdrivers. Timing chains and sprockets should be replaced in sets: when installing a new timing chain, eliminate the crankshaft sprocket with the aid of a puller and install a new one, such that the key in the crankshaft fits into the keyway of the sprocket. Check timing chain dampener for signs of cracking and replace it, if required; use solvent to wash timing chain and sprockets and if possible blow them dry with compressed air. Zebras should be checked for signs of wear and damage, in particular, deformed, chipped, pitted or cracked teeth will be apparent here. For installation, bring the camshaft to bottom with the dowel pin, fix the timing chain with the camshaft sproket, engage the timing chain with the crank sprocket so that the marking touch each other. If the crankshaft to be disturbed, rotate it in the direction of arrow until the crankshaft sprocket arrow is pointing upward and if the camshaft is to be rotated temporarily fit the sprocket and rotate camshaft until the marking on the camshaft sprocket is at the bottom and arrow will point each other simultaneously the reference link mark of chain will be in time with the marks. Place the camshaft sprocket bolt and fasten it properly according to the indicated torque, with engine oil to lubricate the area for wear and tear on the chain and sprocket, put back the timing chain cover and do the rest of the assembling in the opposite manner to its removal.
    Posted by MoparPartsGiant Specialist
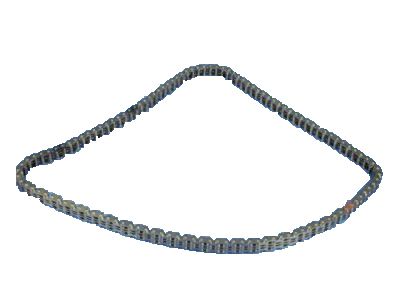
    Q:
    How to remove and install Timing Chain in 3.7L V6 and 4.7L V8 engine on Ram 1500? Posted by Customer
    A:
    The removal of timing system components begins with precautions given the complexity of the system and also possibility of severe engine damage as a result of an unskillful handling. These involve disconnecting the battery, draining the cooling system and removing various engine parts like the cooling fan, drivebelt, fan shroud, heater hoses, radiator hose, power steering pump, alternator, air conditioning compressor etc. The valve covers are then taken off to aid camshaft sprocket alignment and prevent piston-valve contact also. This process requires that you position No. 1 pis- ton at TDC on the exhaust stroke and remove crankshaft damper/pulley timing chain cover and water pump as a unit noting location and bolt types. Additionally these secondary chain tensioners are removed while taking care to detach camshaft sprockets without damaging camshafts. At this stage again these chains have been removed as one assembly along with idler sprocket and crankshaft sprocket that must be positioned accurately for maintaining alignment throughout this entire step. This is followed by inspection of components such as wear or stretch in chains plus proper operation of tensioners/guides. For installation purpose they are reassembled onto idler sprocket while carefully aligning camshaft chains together with primary chain right on a bench top. After that re-check every process applying it again into another engine revolution through two complete turns before finally tightening all remaining bolts with sealer/gasket integrity kept up to its capacity. It ends by changing oil filter as well as filling up cooling.
    Posted by MoparPartsGiant Specialist
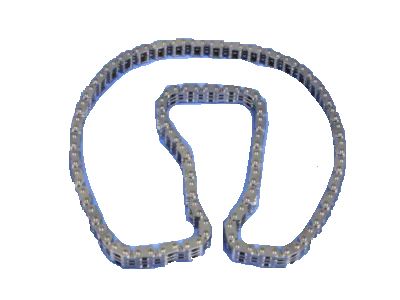
    Q:
    How should the engine be positioned for the removal process for the 2017 Chrysler 200? Posted by Customer
    A:
    Rotate the engine to Top Dead Center for the #1 cylinder on the compression stroke.
    Posted by MoparPartsGiant Specialist
    Q:
    What should be done after installing the timing chain and sprockets for the 2015 Chrysler 200? Posted by Customer
    A:
    Install the lower chain guide and tensioner arm, purge oil from the tensioner, and reset it before installation. Tighten the tensioner retaining plate bolts and install the camshaft sprocket retaining bolts, ensuring proper alignment.
    Posted by MoparPartsGiant Specialist
    Q:
    What preparations are needed for the 2009 Dodge Avenger? Posted by Customer
    A:
    Loosen the lug nuts on the right front wheel, raise the vehicle, and support it securely on jackstands. Then, remove the right front wheel, splash shield, and inner fender shield.
    Posted by MoparPartsGiant Specialist
    Q:
    What should be done after removing the water outlet housing for the 2012 Dodge Avenger? Posted by Customer
    A:
    Support the engine with a block of wood and remove the right engine mount. Then, take off the timing chain cover, ensuring to mark or sketch the locations of various bolts for reinstallation.
    Posted by MoparPartsGiant Specialist
    Q:
    What should be done before starting the engine for the 2012 Dodge Avenger? Posted by Customer
    A:
    Before starting the engine, rotate the crankshaft by hand to check for resistance. Remove old gasket material from all components, install the crankshaft sprocket and oil pump chain if removed, and ensure the keyway is at TDC.
    Posted by MoparPartsGiant Specialist
    See expert answers on similar Timing Chain
    Q:
    What components need to be removed next for the 2012 Dodge Avenger? Posted by Customer
    A:
    Remove the power steering pump, crankshaft pulley, and valve covers, taking care not to let the magnetic timing wheels come into contact with any magnets. Remove the upper and lower oil pans, temporarily install the engine mount crossmember, and raise the engine slightly to remove the right engine mount and bracket.
    Posted by MoparPartsGiant Specialist
    Q:
    What is the caution regarding the timing system for the 2014 Chrysler 200? Posted by Customer
    A:
    The timing system is complex, and severe engine damage will occur if mistakes are made. Only highly experienced individuals should attempt this procedure, and if there is any uncertainty, consulting an expert is advised.
    Posted by MoparPartsGiant Specialist
    Q:
    What should be done before starting the engine for the 2011 Dodge Challenger? Posted by Customer
    A:
    Before starting the engine, rotate the crankshaft by hand through at least two full revolutions, checking for resistance. Remove old gasket material and sealant, install chain guides and tensioners, and ensure the keyway is installed on the crankshaft.
    Posted by MoparPartsGiant Specialist
    Q:
    What should be done with the power steering pump for the 2013 Dodge Challenger? Posted by Customer
    A:
    The power steering pump should be removed without disconnecting the power steering lines.
    Posted by MoparPartsGiant Specialist
    Q:
    What is the introductory information and safety precautions mentioned before starting the timing system removal for the 2015 Ram 1500? Posted by Customer
    A:
    The introductory information mentions that the timing system removal procedure is complex and should only be attempted by highly experienced individuals. It also emphasizes the potential for severe engine damage if mistakes are made. Before starting, disconnect the battery cable and remove the engine cover.
    Posted by MoparPartsGiant Specialist
    Q:
    What should be done after removing the necessary components for the 2013 Ram 1500? Posted by Customer
    A:
    After removing the necessary components, temporarily install the crankshaft pulley bolt and align the timing marks on the crankshaft and camshaft sprockets. Verify that the phaser marks are aligned with the plated links. Mark the direction of rotation on all chains.
    Posted by MoparPartsGiant Specialist
    If you have any questions about this product, please don't hesitate to ask us. We will be happy to help you!

Genuine Mopar Part 5184352AF, the Right Choice

To ensure reliability, purchase Mopar part # 5184352AF Chain-Timing Secondary. It is sometimes referred to as Chrysler Timing Chain. For Mopar owners with dreams of keeping their vehicles running in prime condition, choosing OEM parts is a smart decision. Meticulously crafted, these parts follow strict factory specifications and are manufactured in top-notch facilities with advanced technologies. Furthermore, they undergo rigorous testing to ensure durability and safety, making them a reliable choice for Mopar owners. This part fits specific Chrysler 200, 300, Town & Country models.

MoparPartsGiant.com is a leading supplier of genuine Mopar parts and accessories such as Mopar 5184352AF Chain-Timing Secondary. Wondering where to find exceptional quality and affordable OEM Mopar parts? You have already come to the right place. Our website boasts a huge selection of genuine Mopar parts at the most economical prices possible. What's more, all parts come with a manufacturer's warranty. For detailed Chrysler parts information, click here.

Why choose Mopar Parts Giant

  • Dedicated Service

    Your complete satisfaction is our #1 goal

  • Lowest Prices

    Best deals on genuine OE parts from dealerships

  • Fast Delivery

    Orders are processed and delivered promptly