×
- Live Chat
- 1-888-511-3595

My Garage
My Account
Cart
Genuine Chrysler Imperial Power Steering Pump
Power Steering Pump Unit- Select Vehicle by Model
- Select Vehicle by VIN
Select Vehicle by Model
orMake
Model
Year
Select Vehicle by VIN
For the most accurate results, select vehicle by your VIN (Vehicle Identification Number).
9 Power Steering Pumps found
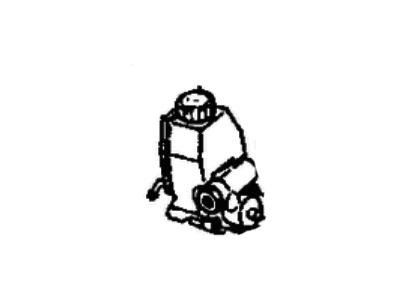
Chrysler Imperial Pump, Assembly Power Steering
Part Number: 5274240$226.73 MSRP: $335.00You Save: $108.27 (33%)Chrysler Imperial Power Steering Pump
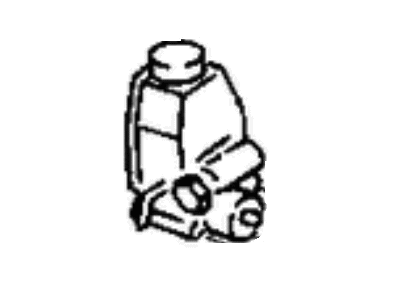
Part Number: 4470314$197.94 MSRP: $251.88You Save: $53.94 (22%)
Chrysler Imperial Power Steering Pump
Chrysler Imperial vehicles use the Power Steering Pump in order to enable the conversion of the energy from the engine to hydraulic power for a much easier steering for the driver. This pump creates the necessary fluid pressure that in dusty helps in rotating the steering wheel especially when at slow speed or even stationary. Leverage includes a V-belt or serpentine belt that is attached to the crankshaft while the hydraulic hose conveys fluids between the pump and the control valve. In the Chrysler Imperial production throughout the years, it has incorporated several manners of Power Steering Pump, mostly hydraulic forms that still have a mechanical link between the steering wheel and the wheels. Hydraulic systems are conventional while new developments have produced electrical powered steering systems that vary the level of assistance provided depending on the speed of the car. Largely this evolution is focused on improving driver experience especially in the area of sensitivity of steering in performance models. A Power Steering Pump inspection on a consistent basis would avoid the following problems in Chrysler Imperial cars, leakage or reduced assist.
Looking for affordable and high-quality auto parts? Then you have already arrived at the proper online shop. We offer all Chrysler Imperial Power Steering Pump at great affordable prices. Moreover, all genuine Chrysler Imperial Power Steering Pump come with a manufacturer's warranty. In the long run, you would realize you have saved a lot of trouble and money with OEM parts from here.
Chrysler Imperial Power Steering Pump Parts Questions & Experts Answers
- Q: How to remove a power steering pump on Chrysler Imperial?A: For the removal process, start by disconnecting the two wires from the air conditioner clutch cycling switch (if equipped) under the hood for 2.5L engine models. Remove the drivebelt adjustment bolt from the front of the pump and the nut from the end hose bracket if applicable. Raise the vehicle, support it with jackstands, and proceed to disconnect the pump return hose, allowing the fluid to drain into a container. While draining, remove the right side splash shield protecting the drivebelts. Disconnect both hoses from the pump, capping open hose ends to prevent contamination. Loosen the two lower pump mounting fasteners, including a bolt and a stud nut, disconnect the drivebelt, and remove these fasteners. To remove the pump, move it rearward to clear the mounting bracket, remove the bracket, and then rotate the pump clockwise until the pump pulley faces the rear of the vehicle, pulling the pump up and out for 2.5L engine models. For 3.0L engine models, open the hood, remove the serpentine drive belt, and unbolt the power steering pump filler tube from the alternator bracket. Remove the hose clamp and detach the filler tube from the pump. Raise the vehicle, support it with jackstands, and detach the exhaust pipe from the manifold by pushing it toward the driver's side for pump removal clearance. Place a drain pan beneath the vehicle, disconnect the hose from the fluid return fitting, and allow the fluid to drain. While draining, disconnect the pressure fitting from the pump and remove the nut securing the pump to the bracket. Unbolt the bracket from the engine and remove it. Using a deep-drive socket, reach through the holes in the pump pulley to remove the two bolts securing the front of the pump to the mounting plate. Lower the pump away from the engine, pass it between the suspension crossmember and the exhaust pipe tunnel in the floorpan, and then remove it for 3.0L engine models. For 3.3L and 3.8L engines, start by removing the serpentine accessory drivebelt, raise the front of the vehicle and support it with jackstands, and place an oil pan to catch leaking power steering fluid. If the power steering pressure switch is present, unplug the switch connector and set it aside. Remove the hose clamp from the low-pressure hose and detach the hose from the pump. Also, remove the hose clamps from the low-pressure hose between the remote reservoir and the pump and detach this hose. Ensure any residual fluid drains into the pan. Next, disconnect the pressure line from the power steering pump and drain any excess power steering fluid from the tube. Remove the right front wheel and proceed to remove the three bolts that attach the power steering pump to the alternator/power steering/belt tensioner mounting bracket. Remove the nut and bolt attaching the power steering pump support strut to the engine block and take out the strut. Lay the power down on top of the steering gear and remove the nut attaching the serpentine drivebelt tensioner to its mounting bracket, also removing the tensioner assembly from the bracket. Remove the nut and bolt attaching the alternator/power steering pump bracket and support strut. Lower the vehicle, remove the two bolts attaching the power steering fluid reservoir to the alternator bracket, and remove the bolt attaching the tube/hose assembly to the power steering pump bracket. Remove the fluid reservoir and tube/hose as a single assembly from the engine compartment. Detach the engine wiring harness routing clip from the alternator bracket, loosen (but do not remove) the bolt holding the engine bracket assembly to the engine support assembly, and remove the upper alternator-to-alternator bracket mounting bolt. Rotate the alternator assembly back toward the dash panel and proceed to remove the four bolts attaching the alternator bracket to the engine and intake manifold. Remove the alternator assembly, laying it on top of the intake manifold without disconnecting the wiring harness. Working from above, pull the power steering pump out through the area between the engine and the firewall. For installation, follow the reverse of the removal process, ensuring the tab on the mounting bracket is correctly positioned for 2.5L engine models, using new O-rings when attaching hoses to the pump, and adjusting belt tension before tightening fasteners. Finish by filling the pump with the specified fluid, starting the engine, bleeding air from the system, and checking the fluid level.


