×
- Live Chat
- 1-888-511-3595

My Garage
My Account
Cart
Genuine Dodge Caravan Timing Chain
Engine Timing Chain- Select Vehicle by Model
- Select Vehicle by VIN
Select Vehicle by Model
orMake
Model
Year
Select Vehicle by VIN
For the most accurate results, select vehicle by your VIN (Vehicle Identification Number).
2 Timing Chains found
Dodge Caravan Timing Chain
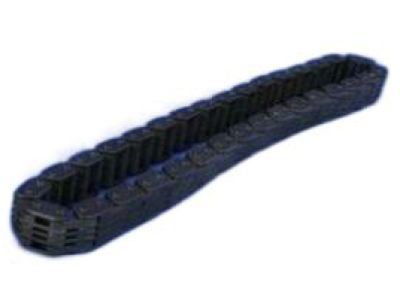
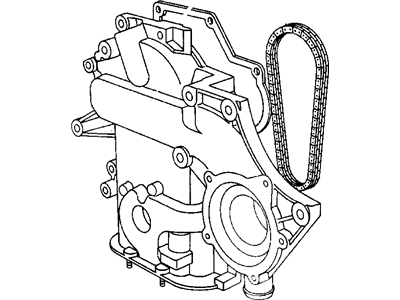
The Dodge Caravan utilizes the Timing Chain in ensuring that the camshaft and the crankshaft rotate in tandem thus enabling the proper sequencing of the valves for the right timing with regard to the engines movement. Situated at the front side of the engine, the timing chain is a little different from the timing belt as it runs endlessly and gets lubricated since it is an important element of the engine durability and its size is generally increased in a higher engine displacement. Timing chains made of metal instead of rubber have been in use in Dodge Caravan models since 1990s, which is preferred for greater sturdiness and the chain doesn't require replacement oftener compared to the rubber belt. Timing chains usually are not worn out but there may be problems as a result of lack of lubrication or the tensioner chain and guides, a message that can be signalled by a rattling sound from the front of the engine. In the pushrod engine configurations, a short chain drive is used due to some disadvantages such as noisy and wearing and this type of design is suitable for Dodge Caravan.
Looking for affordable and high-quality auto parts? Then you have already arrived at the proper online shop. We offer all Dodge Caravan Timing Chain at great affordable prices. Moreover, all genuine Dodge Caravan Timing Chain come with a manufacturer's warranty. In the long run, you would realize you have saved a lot of trouble and money with OEM parts from here.
Dodge Caravan Timing Chain Parts Questions & Experts Answers
- Q: How to disconnect the battery and replace the timing chain and sprocket on Dodge Caravan?A: Disconnect the cable from the negative terminal of the battery. Drain the coolant. Loosen the right-front wheel lug nuts, raise the vehicle, and support it securely on jackstands. Drain the engine oil. Remove the right-front wheel and inner splash shield. Take off the oil pan and the oil pump pick-up tube. Remove the drivebelt. Unbolt the air conditioning compressor from its bracket and set it aside, using mechanics wire to tie the assembly to the fender. Remove the Crankshaft Pulley and the radiator lower hose, along with the heater hose from the timing chain cover housing or water pump inlet for oil cooler equipped models. Remove the right side Engine Mount, unbolt and take off the idler pulley from the engine mount bracket, and then remove the bolts and the engine mount bracket. Remove the camshaft sensor from the timing chain cover and the water pump. Remove the bolt and the power steering pump support strut to the front cover, followed by the timing chain cover-to-engine block bolts. Temporarily install the crankshaft pulley bolt and turn the crankshaft to align the timing marks on the crankshaft and camshaft sprockets, ensuring the crankshaft arrow is at the top and the camshaft sprocket arrow is at the bottom. Remove the camshaft sprocket bolt without turning the camshaft, and carefully pry the camshaft sprocket off the camshaft dowel pin using two large screwdrivers. Replace timing chains and sprockets in sets; if installing a new timing chain, remove the crankshaft sprocket with a puller and install a new one, aligning the key in the crankshaft with the keyway in the sprocket during installation. Inspect the timing chain dampener for cracks and wear, replacing it if necessary. Clean the timing chain and sprockets with solvent and dry them with compressed air. Inspect components for wear and damage, looking for deformed, chipped, pitted, or cracked teeth. Replace the timing chain and sprockets if the engine has high mileage, if the chain shows visible damage, or if total freeplay exceeds one inch. Failure to replace a worn timing chain and sprockets may lead to erratic engine performance, loss of power, and decreased fuel mileage, with the worst-case scenario being severe engine damage from chain "jumping" or breakage. Use a gasket scraper to remove old gasket material and sealant from the cover and engine block, taking care not to damage the aluminum cover. Clean the gasket sealing surfaces with lacquer thinner or acetone. Turn the camshaft to position the dowel pin at the bottom, mesh the timing chain with the camshaft sprocket, and engage it with the crankshaft sprocket, ensuring the timing marks are aligned. If the crankshaft has moved, turn it until the arrow on the crankshaft sprocket is at the top. If the camshaft was turned, temporarily install the sprocket and turn the camshaft until the sprocket timing mark is at the bottom, ensuring the arrows point to each other and the timing chain colored reference links align with the timing marks on the sprockets. Install the camshaft sprocket bolt and tighten it to the specified torque. Lubricate the chain and sprocket with clean engine oil. Stick the new gasket to the cover, ensuring the bottom edge is flush with the bottom of the cover, then attach the cover to the engine block, aligning the flats of the oil pump gear with the flats on the crankshaft. Install the bolts and tighten them in a criss-cross pattern in three steps to the specified torque. The installation of the remaining components follows the reverse order of removal. Add oil and coolant, start the engine, and check for leaks.


