×
- Live Chat
- 1-888-511-3595

My Garage
My Account
Cart
Genuine Dodge Neon Crankshaft
Crank Shaft- Select Vehicle by Model
- Select Vehicle by VIN
Select Vehicle by Model
orMake
Model
Year
Select Vehicle by VIN
For the most accurate results, select vehicle by your VIN (Vehicle Identification Number).
3 Crankshafts found
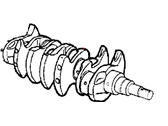
Dodge Neon Crankshaft
Looking for affordable and high-quality auto parts? Then you have already arrived at the proper online shop. We offer all Dodge Neon Crankshaft at great affordable prices. Moreover, all genuine Dodge Neon Crankshaft come with a manufacturer's warranty. In the long run, you would realize you have saved a lot of trouble and money with OEM parts from here.
Dodge Neon Crankshaft Parts Questions & Experts Answers
- Q: How can the crankshaft be removed from the engine after it has been taken out on Dodge Neon?A: In that case, the crankshaft can only be removed once the engine of the vehicle has been pulled out, if in addition to the flywheel and crankshaft pulley accompanied by timing belt, oil pan, oil pumps body and filter, piston/ connecting rod assemblies are also to be removed. Before removal, check and take the crankshaft end float with an adjustable dial indicator placed on the crankpin. To do that pry the crankshaft to the rear, set the indicator at zero then pry the crankshaft to the front to read the number that should be between 0.003 to 0.010 inch. In case a dial indicator cannot be employed, the clearance can be measured using a feeler gauge. While performing this step, turn the main bearing cap assembly bolts in a star-like manner to a turn; then tap the assembly gently with a soft hammer and, using extra care, lift it off the block. Lift off the crankshaft, which at this should be extremely heavy and you may need some help in the process, and then install the main bearing cap assembly complete with the provided bearing inserts. For installation, be sure to have the engine block and crankshaft clean and checked. Place the block in the vertical manner with the bottom end up, unbolt the main bearing caps and clean the caps also clean the bearing area. New upper main bearing insert shall be fitted and it shall be checked to ensure that oil holes are in aligned position while lower insert shall be fitted in the cap assembly. Confirm the Plastigage reading for the main bearing oil clearance with no dirt or oil as it might give a wrong indication. In case there is an incorrect clearance, then check the sizes of bearing inserts and remove all the deposits. For the final fit and assembly, spread a thin layer of oil on the bearing faces and spread the crankshaft again and measure and fit the main bearing assembly with correct type of sealant. Turn bolts in the sequence shown here for various model years to align the thrust bearing and to check crankshaft endplay after that. Turn the crankshaft to see that if there is any drag and if so, replace it with a new one together with a new rear main oil seal.


