×
- Live Chat
- 1-888-511-3595

My Garage
My Account
Cart
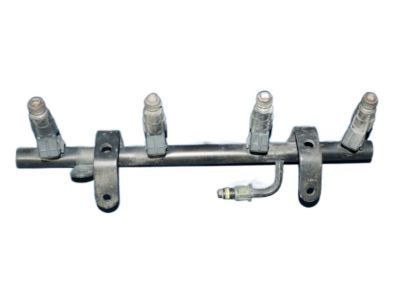
Genuine Chrysler Cirrus Fuel Rail
Engine Fuel Rail- Select Vehicle by Model
- Select Vehicle by VIN
Select Vehicle by Model
orMake
Model
Year
Select Vehicle by VIN
For the most accurate results, select vehicle by your VIN (Vehicle Identification Number).
2 Fuel Rails found
Chrysler Cirrus Fuel Rail
Looking for affordable and high-quality auto parts? Then you have already arrived at the proper online shop. We offer all Chrysler Cirrus Fuel Rail at great affordable prices. Moreover, all genuine Chrysler Cirrus Fuel Rail come with a manufacturer's warranty. In the long run, you would realize you have saved a lot of trouble and money with OEM parts from here.
Chrysler Cirrus Fuel Rail Parts Questions & Experts Answers
- Q: How to remove and install Fuel Injector and Fuel Rail on Chrysler Cirrus?A: To check fuel injector operation, start the engine and let it warm up to normal operating temperature. Remove the air cleaner assembly, and if the vehicle lacks a tachometer, connect one according to the tool manufacturer's instructions. Ensure all test equipment is clear of drivebelts and cooling fans, then start the engine. With the engine idling, disconnect each fuel injector electrical connector one at a time, noting the rpm change on the tachometer before reconnecting the injector. On V6 engines, this test applies only to the left bank of fuel injectors after removing the air inlet resonator. If the rpm change is consistent across cylinders, the injectors are functioning correctly; if not, proceed to the next injector. If the injectors are operating properly, check the ignition system, spark plugs, and wires, and perform a compression check if needed. For V6 engines, remove the upper intake manifold, disconnect the injector electrical connectors, and measure the resistance of each injector with an ohmmeter, ensuring it is approximately 12 ohms. If the resistance is out of specification, replace the injector. If the resistance is correct, connect a special injector harness test light to the injector electrical connector; if the light flashes, the injector is receiving voltage. If there is no voltage, check the ASD relay operation and the injector wiring circuit for issues. With the electrical connector removed, use a fused jumper wire to connect one terminal of the injector to the positive terminal of the battery and the other terminal to a solid ground on the engine, ensuring the wires are insulated. Each time the injector is energized and de-energized, it should make a "cl clicking" sound; if not, replace the injector. Repeat this for each injector, and if they are all functioning properly, reinstall all removed components in reverse order. For a fuel injector leak check, first relieve the fuel pressure, then remove the fuel rail and injector assembly from the intake manifold without disconnecting the fuel supply line or injectors. Place clean shop rags under the injectors to catch leaking fuel, reconnect the fuel pump module electrical connector, and turn the ignition key to the ON position several times to pressurize the fuel system. Relieve the fuel pressure through a faulty injector by pushing the injector pintle off its seat with a screwdriver, catching the escaping fuel with a rag. After relieving the pressure, detach the fuel supply line quick connect fitting and replace any faulty injectors. For removal, disconnect the negative battery cable, remove the air cleaner assembly, and on V6 engines, the upper intake manifold. Detach the fuel supply line quick-connector fitting from the fuel rail, disconnect the wiring harness from the injectors, and clean the injector-to-manifold area. Remove the fuel rail mounting bolts and the fuel rail assembly with the injectors attached. Withdraw the injectors from the fuel rail, removing and discarding the O-ring seals. Clean and inspect the upper-to-lower manifold gasket surfaces on V6 engines. For installation, apply clean engine oil to new O-ring seals and install them onto the injectors, securing the injectors to the fuel rail with retaining clips. Ensure the fuel rail spacers are installed on V6 engines, then install the injector/fuel rail assembly onto the intake manifold, tightening the fuel rail mounting bolts. Connect the fuel supply line quick-connect fitting, reattach the fuel pump module electrical connector, and the negative battery cable. Turn the ignition key to the ON position several times to pressurize the fuel system and inspect for leaks, rectifying any issues as necessary. Complete the installation by reversing the removal steps, ensuring to install a new upper intake manifold gasket on V6 engines and tightening the upper intake manifold bolts.


