×
- Live Chat
- 1-888-511-3595

My Garage
My Account
Cart
Genuine Chrysler Imperial CV Joint
CV Joint Axle- Select Vehicle by Model
- Select Vehicle by VIN
Select Vehicle by Model
orChrysler
Imperial
Year
Select Vehicle by VIN
For the most accurate results, select vehicle by your VIN (Vehicle Identification Number).
1 CV Joint found
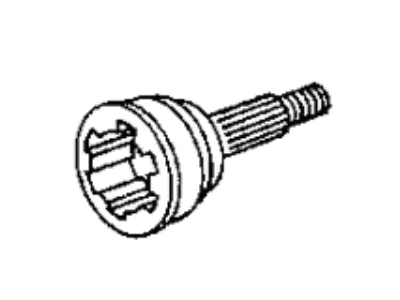
Chrysler Imperial CV Joint
In Chrysler Imperial automobiles, the CV Joint is responsible for spinning transfer of torque from the transmission to the driving wheels, supplied that its speed is constantly governed, say in front-wheel-drive cases. These joints are strategic and they play the role of allowing movement of the suspension and the steering besides facilitating power transmission. Some of CV Joints that have been used in Chrysler Imperial vehicles include, Rzeppa Joint: This type of joint is used in outboard applications, and the other is tripod Joint that is for in board use. The major difference of these types is in their construction and operation, Rzeppa joints can afford high degree or articulation and tripod joints affords axial motion. Every CV Joint has rubber boots that help to shield the part from the environment, regular servicing is vital to prevent wear and failure.
Looking for affordable and high-quality auto parts? Then you have already arrived at the proper online shop. We offer all Chrysler Imperial CV Joint at great affordable prices. Moreover, all genuine Chrysler Imperial CV Joint come with a manufacturer's warranty. In the long run, you would realize you have saved a lot of trouble and money with OEM parts from here.
Chrysler Imperial CV Joint Parts Questions & Experts Answers
- Q: How to disassemble and inspect CV joints for driveaxles on Chrysler Imperial?A: To begin, loosen the hub nut and wheel lug nuts, then elevate the vehicle and securely support it using jackstands. Next, remove the driveaxles and determine the type of CV joints present. For driveaxles with properly functioning CV joints and no noise or vibration issues, boot replacement is sufficient. However, if the CV joint exhibits significant wear or has operated without lubrication due to a damaged boot, disassembly and inspection become necessary. To disassemble the inner CV joint, remove the clamps and slide back the boot to access the tripod. Depending on the CV joint type, follow specific procedures: for early GKN driveaxles, bend the retaining tabs back with pliers while compressing the retention spring; for later GKN driveaxles, secure the CV joint housing in a vise and gently pull on the shaft to release the tripod rollers; for SSG driveaxles, remove the tripod using a wire ring retainer in a groove on the housing. Regardless of the type, support the housing to prevent excessive angles and roller detachment. Remove the snap-ring for all but later GKN axles. Clean the grease from the tripod assembly and inspect for wear, damage, corrosion, or excessive play, replacing damaged components. Inspect the inner splined area for wear and damage. Clean the housing, check its splines, ball races, spring, spring cup, and the spherical end of the shaft for wear, damage, nicks, and corrosion, replacing worn or damaged parts. Install a new boot, securing it with a clamp. For the outer CV joint, remove the boot clamps and push the boot back. If the CV joint was operating correctly with uncontaminated grease, replace the boot; otherwise, proceed with disassembly to assess if replacement is necessary. Clean the axle spline area, check for wear, and clean the outer CV joint bearing assembly, marking the relative positions of the components. Secure the housing shaft in a vise and remove the housing using a soft-face hammer, supporting the CV joint to prevent damage. For SSG driveaxles, mark the position of the damper weight, loosen the damper weight bolts, slide the weight and the boot toward the inner joint, remove the circlip with snap-ring pliers, and slide off the inner joint. Remove the boot and, if the CV joint was noisy or grease was contaminated, proceed with disassembly. Remove the circlip from the axle groove, clean the spline area, and inspect all components for damage, wear, corrosion, or cracks. Replace any unserviceable parts and, if needed, replace the outer housing wear sleeve. Prior to reassembly, apply a thin coat of oil to all CV joint components. Reassemble the CV joint components, aligning marks as needed, and install the cross in the cage. Rotate the cross into position in the cage and housing, ensuring the marks face out and are aligned. Pack the lubricant into the ball races and grooves, install the balls, place the driveaxle in the vise, slide the boot over it, and install a new circlip in the axle groove. Finally, position the CV joint housing on the axle, align the splines, and secure it by tapping with a soft-face hammer, verifying it's seated on the circlip by testing its pull resistance, then install the boot.


