My Garage
My Account
Cart
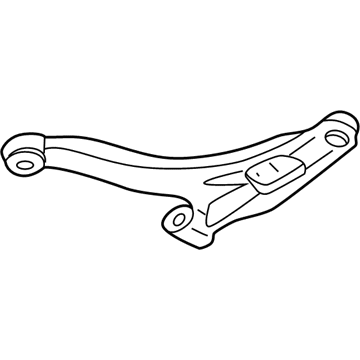
Genuine Chrysler PT Cruiser Control Arm
Suspension Arm- Select Vehicle by Model
- Select Vehicle by VIN
Select Vehicle by Model
orMake
Model
Year
Select Vehicle by VIN
For the most accurate results, select vehicle by your VIN (Vehicle Identification Number).
6 Control Arms found

Chrysler PT Cruiser Front Lower Control Arm
Part Number: 4656730AN$248.65 MSRP: $376.00You Save: $127.35 (34%)Chrysler PT Cruiser Suspension Control Arm
Part Number: 4656730AH$248.65 MSRP: $376.00You Save: $127.35 (34%)
Chrysler PT Cruiser Front Lower Control Arm
Part Number: 4656731AN$248.65 MSRP: $376.00You Save: $127.35 (34%)
Chrysler PT Cruiser Front Left Lower Suspension Wishbone Control Arms
Part Number: 4656731AH$248.65 MSRP: $376.00You Save: $127.35 (34%)Chrysler PT Cruiser Suspension Control Arm
Part Number: 4656730AL$248.65 MSRP: $376.00You Save: $127.35 (34%)Chrysler PT Cruiser Suspension Control Arm
Part Number: 4656731AL$248.65 MSRP: $376.00You Save: $127.35 (34%)
Chrysler PT Cruiser Control Arm
The Control Arm in Chrysler PT Cruiser class of automobiles is a profound component that connects the frame of the automobile to the wheels; it supports other suspension parts such as shocks and springs. These arms rotate independently based on the road characteristics and enable the wheels to perform the up and down movement. Different types of control arms exist in automobiles, and they all incorporate bushings where they are joined to the framework and ball joints where they are joined to the knuckle or axle. The next generations of PT Cruiser might have more rigid cast iron, or aluminum control arms that are strong and also lightweight. All these components are crucial for wheel alignment, road stability, and consequent equal wearing out of the tires. A set of performance control arms can be used by those desiring a stiffer setup as well as options for tuning and changes needed for fast driving or use for modified vehicles.
Looking for affordable and high-quality auto parts? Then you have already arrived at the proper online shop. We offer all Chrysler PT Cruiser Control Arm at great affordable prices. Moreover, all genuine Chrysler PT Cruiser Control Arm come with a manufacturer's warranty. In the long run, you would realize you have saved a lot of trouble and money with OEM parts from here.
Chrysler PT Cruiser Control Arm Parts Questions & Experts Answers
- Q: How to Remove and Inspect a Control Arm on Chrysler PT Cruiser?A:To remove the control arm, start by loosening the wheel lug nuts and raising the front of the vehicle. Support it securely on jackstands and remove the wheel. Remove the ball joint pinch bolt and nut, then disconnect the stabilizer bar links from the control arms and rotate the bar down. Use a pry bar to disconnect the control arm from the Steering Knuckle and pull the ball joint stud from the steering knuckle. If removing the right control arm, remove the pencil strut and engine lower torque strut. Remove the bolt and nut securing the front of the control arm to the cross member, then remove the bolt that attaches the rear of the control arm to the cross member. Finally, remove the control arm. To inspect the control arm, ensure it is straight and replace if bent. Inspect the bushings and replace if cracked or worn out. To install the control arm, reverse the removal steps, ensuring to tighten the pivot bolt and rear mounting bolt with the control arm raised to simulate normal ride height. Tighten the control arm's front bolt first, then the rear bolt. Install and align the engine lower torque strut. Finally, install the wheel, lower the vehicle, and tighten the lug nuts.


